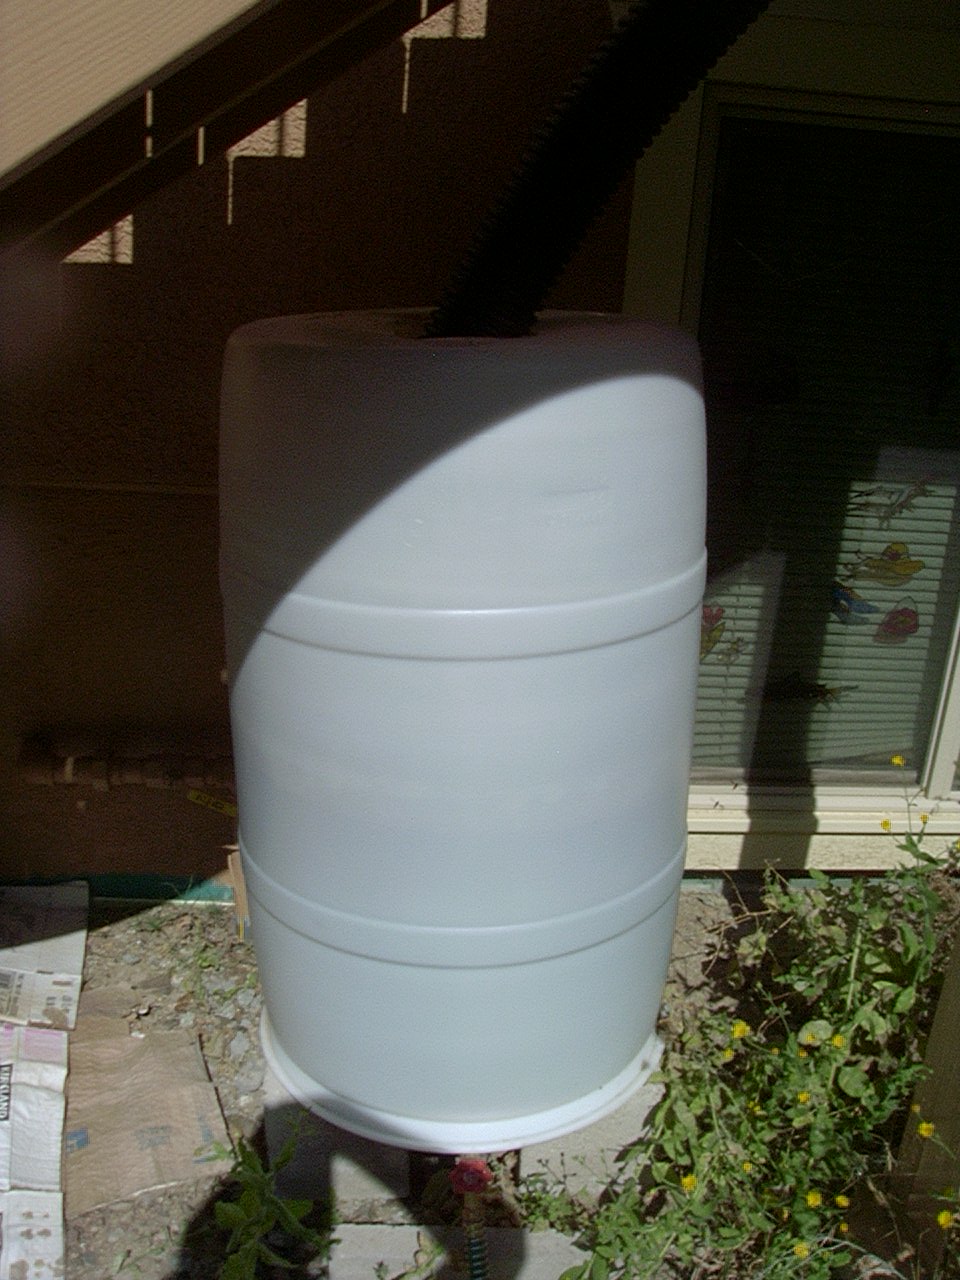
I know this blog has been silent for many months. It is certainly not because there is little going on here in Mad Bioneer world. Life has been full of changes and I have been working very hard on some very interesting projects that have come together very, very well. The picture shows my current setup, which I now have fully assembled and functional. Over the next several posts I will explain my intermediate steps, of which there have been plenty, and how I got to where I am, including my successes and failures.
But first of all, I want to start with the hypothesis I was testing. After all, that is where all good science starts. As I have mentioned before, I am not a big fan of hydroponics. My passion is the understanding of each of the roles that living organisms play in the overall health and functionality of a living system and making sure that those roles are filled by something in my system. Any system that removes all of the life except the plant and requires the operator (and expensive machinery) to do their work is pretty much the opposite of what I want to do.
However, with some great conversations with the very knowledgeable guys at Home Grown Hydroponics in Tempe, AZ, I have come to understand that that is just one version of hydroponics. As I dug farther into this on my way to eventually designing and building my very own aquaculture greenhouse, I settled on some version of aquaponics. For those of you not familiar, this is a system where a fish tank is connected up to some grow beds. The water from the tank is regularly pumped through the grow beds, where the plants filter the fish waste out of the water. It filters the water for the fish and fertilizes the plants all in one ingenious system.
However, being at my core a soils guy, I was just not content to toss the soil out the window. After all, that is where the magic happens. I have said it before and I have said it again: A gardener doesn't take care of his plants. He takes care of his soil. The soil takes care of the plants. So I wanted to see if I could manage an aquaponics system using soil instead of media.
I did some amount of digging and most of what I found used media with aquaponics, not soil. The one book I had not only discouraged its use, but actually said some stunningly inaccurate things about the role soil plays in a plant's health. But aside from saying that the soil essentially is just holding the plant up, the only reason it gave for not using soil is that it will color the water, making it harder to check on your fish. I can tell you from experience that this is true, but that the colored water is in no way harmful to the fish. While it would be neat to watch my fish closely every day, I have other ways of determining how healthy they are.
So here I am, with a fully functional test system that incorporates not only soil into aquaponics, but also hugelkultur. And, boy oh boy am I having fun. Stay tuned, as I will be going into great detail about how I got here. It will probably be way more detail than you wanted, but hey, I find that everyone else leaves out all the details I want, so I may as well be different.
Showing posts with label greenhouse. Show all posts
Monday, July 29, 2013
Monday, September 5, 2011
Balancing an Aquatic Ecosystem - Animals
Lately I have been planning out how to balance the aquatic ecosystem in my future aquaculture greenhouse. It is a tricky concept to try to produce a significant amount of food out of a tank that is somewhere between 1100 and 2500 gallons and still have a self-regulating system. The important part is to set up a stable food web.
The thing to remember about food webs is that the base, your plants (in this case phytoplankton and duckweed), is limited by the input of nutrients and the size of the system. It can only get so big. From there on up the food web, each successive level gets smaller . If you have too many levels and you eat from the top, you don’t get much food, so the ideal food fish is capable of filter feeding on the phytoplankton. It just so happens that tilapia are just such a fish. However, I never can leave well enough alone, so I don’t want a simple system. I want an elegant, interesting system.
Currently I am considering a combination of three larger species in the tank: mosquitofish, crawdads (or as some people call them, crayfish), and tilapia. I am thinking that the three will probably work pretty well together in there.
The tilapia will obviously be the star of the show. Blue tilapia are omnivores and eat a mixture of plant and animal material. They will primarily feed on the algae and duckweed or other plant material I drop in there from the garden, but are also known to occasionally eat small fish (like mosquitofish), small invertebrates (perhaps juvenile crawdads), mosquito larvae, and other zooplankton. Since the whole system is designed to support these fish, I obviously don’t want to seriously endanger them with predators. However, considering how prolific tilapia are as breeders, many commercial producers introduce predators to keep the population at a manageable level. Crawdads are known to occasionally take small fish and often eat eggs. However, the tilapia brood their eggs in their mouths for protection, so I am not too worried about the eggs. I think that a few fry lost to crawdads wouldn’t be a problem.
Crawdads will be the cleanup crew. They mostly eat rotting vegetation and animal matter. So if a fish dies, the crawdads will probably eat it, meaning I won’t have to clean it up. I still need to do a little more research on that one to make sure it is the case. Plus, crawdads are edible, so they make another, smaller food source. Many crawdads climb up on banks to reproduce and I don’t have banks, only walls. That means they not reproduce, which may be a problem. If it is the case, I have an ample supply of invasive crawdads in the lakes and streams in my area. I’ll just need a trap. The biggest problem with crawdads, in my mind, is getting rid of them if I find out they are harmful to the ecosystem I have set up. Even if I drain the whole pond and leave it dry for a few weeks and start over, it may not completely get rid of them. The pond isn’t designed to drain completely and the plants above will be constantly leaking water into the pond area as I water them.
The mosquitofish are relatives of guppies, only much, much tougher. They do very well surviving high water temperatures, low oxygen content, and poor water quality. They are also prolific breeders and will probably fill the pond pretty quickly. Their diet consists mainly of insects, insect larvae (like mosquito larvae), and zooplankton. There is a bit of overlap between the diets of the tilapia and the mosquitofish, so I am a bit worried that there will be more competition for food going on there than I want. However, the baby mosquitofish, which are born live, will serve as a food source for the tilapias, so it probably won’t be a problem. I am not sure if the tilapias will eat the adult mosquitofish or not. The crawdads almost certainly will, though, and that means that a lot of the little fish that the crawdads take from the water would actually be mosquitofish rather than baby tilapia, which will help give a little school protection to the baby tilapia. Ultimately, the mosquitofish would serve more as another food source for the tilapia than mosquito protection, though that benefit would be good as well.
Monday, August 29, 2011
Aquaculture Greenhouse: The Sand Filter
I recently found out that a new coworker is something of an expert on setting up large aquariums and their filtration systems. This is something of a boon to me, since I don’t know a lot about it and am currently doing lots of research to fill the cavernous gaps in my knowledge. I only got to talk to Mike for about 5 minutes on the subject, but he already found a big flaw in my plan. Fortunately, I think it is one I can fix.
As I mentioned in a previous post, I am planning on flooding the lower two feet of my future greenhouse and growing fish under the path between beds. The goal is to create a balanced aquatic ecosystem. Ideally, the organic compounds that leach out of the soil or come from the greywater will be enough to feed the phytoplankton in the water, which will then become the base of the food chain in my tank.
The problem Mike found is in my soil. My garden beds, which will extend 3’ above the water level, will be made entirely of organic matter, with minor amounts of sand and pea gravel thrown in for soil structure. Organic matter that is below the water line can be a problem, though, as it will undergo anaerobic decomposition and pollute the water with toxic chemicals. My solution was to fill the area under the soil with sand.
According to Mike, any sort of filter for biologically alive water will quickly fill with a sort of slime. It is a good thing, as it really helps filter the water. However, it will grow to fill the pore spaces to the point where no water will get through and the water will back up and drown my plants. The only way to stop this from happening is to stir the sand every couple of months to break it up. This is obviously not an option as the sand will be underneath 3’ of productive garden soil.
My first thought was to come up with some sort of tray system. The weight of the soil above makes horizontal trays too cumbersome to deal with, so I thought vertical trays every few feet might solve that problem. That still requires a structure around it to enable me to pull it out and there are lots of ways that could go wrong.
Another option would be to just put drains every few feet just above water level. That way, when it plugs, there is an overflow drain that would continue to function. This is still a very viable option, but I really don’t like it much. When the sand is completely plugged, it becomes not only unusable space under the soil, but also stagnant and anaerobic. I am not fond of that plan.
Then it occurred to me that the primary purpose of the sand was not as a filter, but as a spacer, keeping organic soil above the water line. What if I used something else as a spacer instead. The soil will still do most of the filtering necessary, so the sand isn’t really needed. The product that comes to mind most quickly is a system of grids that are used for rainwater retention systems. They are made of a stiff plastic and are designed to hold a lot of weight while still having a lot of open volume for water storage. If I could put those in there and a layer of landscape fabric on the top, I would have something that would most likely not plug and would increase the amount of water I could hold in there considerably. Of course, there are other structural features I could use. I could go all Roman aqueduct on it and use stone arches. That would be pretty cool and would last forever. It would probably be cheaper as well. Stacked cinderblocks would probably also work, but wouldn’t leave as much room for water.
So far, the open water solution is my best. It increases the volume of water for the fish to swim in from 1100 gallons to around 2500 gallons. But that leaves me with a new dilemma. What organisms do I allow to access that area. It will be very difficult to get in there to do any kind of maintenance, so anything that dies in there stays in there. Also, if I decide that a particular organism is a pest, I will really never be able to clean it out of the system without draining the pond and starting over. The cavern also gives the fish a good hiding place, which may or may not be a good thing.
I love this process.
As I mentioned in a previous post, I am planning on flooding the lower two feet of my future greenhouse and growing fish under the path between beds. The goal is to create a balanced aquatic ecosystem. Ideally, the organic compounds that leach out of the soil or come from the greywater will be enough to feed the phytoplankton in the water, which will then become the base of the food chain in my tank.
The problem Mike found is in my soil. My garden beds, which will extend 3’ above the water level, will be made entirely of organic matter, with minor amounts of sand and pea gravel thrown in for soil structure. Organic matter that is below the water line can be a problem, though, as it will undergo anaerobic decomposition and pollute the water with toxic chemicals. My solution was to fill the area under the soil with sand.
According to Mike, any sort of filter for biologically alive water will quickly fill with a sort of slime. It is a good thing, as it really helps filter the water. However, it will grow to fill the pore spaces to the point where no water will get through and the water will back up and drown my plants. The only way to stop this from happening is to stir the sand every couple of months to break it up. This is obviously not an option as the sand will be underneath 3’ of productive garden soil.
My first thought was to come up with some sort of tray system. The weight of the soil above makes horizontal trays too cumbersome to deal with, so I thought vertical trays every few feet might solve that problem. That still requires a structure around it to enable me to pull it out and there are lots of ways that could go wrong.
Another option would be to just put drains every few feet just above water level. That way, when it plugs, there is an overflow drain that would continue to function. This is still a very viable option, but I really don’t like it much. When the sand is completely plugged, it becomes not only unusable space under the soil, but also stagnant and anaerobic. I am not fond of that plan.
Then it occurred to me that the primary purpose of the sand was not as a filter, but as a spacer, keeping organic soil above the water line. What if I used something else as a spacer instead. The soil will still do most of the filtering necessary, so the sand isn’t really needed. The product that comes to mind most quickly is a system of grids that are used for rainwater retention systems. They are made of a stiff plastic and are designed to hold a lot of weight while still having a lot of open volume for water storage. If I could put those in there and a layer of landscape fabric on the top, I would have something that would most likely not plug and would increase the amount of water I could hold in there considerably. Of course, there are other structural features I could use. I could go all Roman aqueduct on it and use stone arches. That would be pretty cool and would last forever. It would probably be cheaper as well. Stacked cinderblocks would probably also work, but wouldn’t leave as much room for water.
So far, the open water solution is my best. It increases the volume of water for the fish to swim in from 1100 gallons to around 2500 gallons. But that leaves me with a new dilemma. What organisms do I allow to access that area. It will be very difficult to get in there to do any kind of maintenance, so anything that dies in there stays in there. Also, if I decide that a particular organism is a pest, I will really never be able to clean it out of the system without draining the pond and starting over. The cavern also gives the fish a good hiding place, which may or may not be a good thing.
I love this process.
Thursday, August 25, 2011
Aquatic Systems of Life
Ever since I was a kid, my hobby has been creating terrestrial systems of life. The trick with creating good ones is to balance the cycling of nutrients through the system such that the beneficial organisms out compete the disease-causing organisms. In terrestrial systems, you have a plant to cycle water and oxygen and provide a centerpiece. In larger systems it can also provide food. You have a fungus to decompose decaying plant material. I prefer mushrooms because they also provide food, even in small systems. Earthworms till the soil and decompose vegetative and fungal matter. Beneficial bacteria take up most of the rest of the niches. In order to keep the system healthy, a regular infusion of organic matter is about all that is required. Without the mushrooms and earthworms, disease and pest organisms, such as gnats and disease-causing bacteria and fungus can get in and dominate the system, reducing the health.
After my big idea of creating a stock tank with tilapia in it a few months ago, I am considering a foray into the creation of aquatic systems of life. First of all, let me say that I don't know a lot about it. Yet. I do need to find two good books. The first needs to be on aquaculture. The second will need to be on how to create and balance aquatic systems of life. If any of you have any good suggestions, I would certainly appreciate them.
The basic need of aquatic systems is going to be the same as in terrestrial systems. The flow of nutrients through the system is going to be crucial. However, in aquatic systems, the balancing of this system is much more important than it is in terrestrial systems. Water is a much more robust system for life to flourish in, so algal or bacterial blooms that could potentially be harmful can happen in a matter of days rather than weeks like they would in soil. First of all, fungal allies are out of the picture, so other players need to be introduced to do a lot of the decomposition quick enough that the harmful bacteria don't get to it.
Right now, I am thinking that the first step to creating the pond at the bottom of the greenhouse will be to create a robust system with players that are either really tough or pretty easily disposable. For the first year or so, I will be actively building soil in the garden beds above the pond. This will involve the addition of lots of organic matter that will need to decompose into healthy soil. As the grey water from the house filters through the decomposing organic matter and down into the pond, it will carry a lot of nutrients with it. I need organisms in there that will filter out those nutrients in a way that is healthy for the aquatic ecosystem.
Those organisms can balance the system until the tilapia arrive, with many of them providing food for the tilapia once they get there. I am sure that the cast of players will change as I do further research and give it more thought, but here is the cast of characters I am currently considering:
1) Water from a real pond - I will find a healthy pond and collect a gallon or so of the water from it. Ideally, it will be a clear pond without obvious signs of pollution or algae blooms or the like. I think I have just the source. This water will carry with it the necessary bacteria, algae, and other microorganisms for treating my water and making it healthy. It will also form the base level of the aquatic food chain, the food chain that will feed off of the nutrients in the water and feed my larger forms of life.
2) Snails - I need to be careful about this one, but I am thinking that aquatic snails will serve as grand decomposers, helping to fill the niche that earthworms take up in soil. They will burrow through and consume the layer of muck that ends up on the bottom of the pond. I just need to make sure that I find a species that is aquatic only and won’t climb the walls at night and eat my plants.
3) Duckweed. From what I understand, duckweed will meet two major needs. It will filter nutrients from the water, cleaning the water. It will also serve as an eventual food source for the tilapia. It reproduces rapidly, so a solid colony of duckweed in place when the tilapia arrive would be a very good thing. There are probably other aquatic plants that I could put in to serve a similar purpose.
4) Crawdads (crayfish) - They are not native to my area, but are very common in the lakes and streams around here. As such, local wildlife managers want rid of them as much as possible, so I have a nearly endless supply. Crawdads will also help consume dead and dying matter, especially animal matter, like dead fish. I am hoping that they will also act as a food source for the tilapia. I’ll have to look into that one. The one note of caution is that crawdads eat fish eggs. Too many, and my tilapia won’t be able to reproduce. That is, unless they can eat the crawdads. It might be a self-balancing system.
5) Guppies - One of my wife’s worries about the tank is mosquitoes. There is a little fish called a mosquito fish that lives almost exclusively on mosquito larvae. Guppies are a close relative and are readily available and inexpensive. They also consume mosquito larvae. Additionally, they are prolific breeders and stay small. There is a good chance that if I got a really healthy population going, they would serve as a good initial food source for the tilapia.
6) Catfish -. This is probably more of a hope than a reality. My real hope is that I can get a system in place such that I don’t have to buy food for the fish. I suspect that if I include catfish in the pond, I’ll probably have to buy food to keep them going. But I know that tilapia eat catfish waste and I know that catfish are bottom feeders, consuming organic matter on the bottom of the pond. So there is hope. Again, research.
7) Plecostomus - I figure one of these will be enough, especially if I can find a big one. He will definitely have to be big enough to not get eaten once the tilapia are introduced. But this guy, along with a little help from the snails, would have the job of keeping the algae down on the sides of the tank and keeping everything clean.
I am sure that there are plenty of other players needed. I will probably need something that will act as an intermediate step between the plankton and the guppies. The food web needs to be complete for the system to function as a whole. I think that even after the soil is complete, there will be enough nutrients washing through the soil to keep the system fed and active.
Once the tilapia are introduced, they should have enough food in the tank to begin reproducing rapidly and producing more fish. Ideally, the tank ecosystem will provide most to all of the food they need. As they get more numerous, I will supplement with black soldier flies, but that is another post.
As a first test of how well such systems might work, I introduced 8 guppies, 4 feeder goldfish, about a dozen tiny snails, and about 4 cone snails to a 55 gallon rain barrel I have on the side of the house. 2 of the feeder goldfish and 1 of the guppies died within the first 48 hours of being introduced to the system. However, the rest of them seem to be thriving despite the fact that I don't feed them. Actually, I do occasionally drop bugs in there to see what the guppies eat. They particularly liked the weed covered in aphids. But I definitely haven’t given them enough to eat that they would survive if they weren’t finding something in the water to eat. The guppies have even reproduced already. I know the tiny snails have as well, because they are already all over the place in there. So I will watch that system for a while and see what I can learn.
After my big idea of creating a stock tank with tilapia in it a few months ago, I am considering a foray into the creation of aquatic systems of life. First of all, let me say that I don't know a lot about it. Yet. I do need to find two good books. The first needs to be on aquaculture. The second will need to be on how to create and balance aquatic systems of life. If any of you have any good suggestions, I would certainly appreciate them.
The basic need of aquatic systems is going to be the same as in terrestrial systems. The flow of nutrients through the system is going to be crucial. However, in aquatic systems, the balancing of this system is much more important than it is in terrestrial systems. Water is a much more robust system for life to flourish in, so algal or bacterial blooms that could potentially be harmful can happen in a matter of days rather than weeks like they would in soil. First of all, fungal allies are out of the picture, so other players need to be introduced to do a lot of the decomposition quick enough that the harmful bacteria don't get to it.
Right now, I am thinking that the first step to creating the pond at the bottom of the greenhouse will be to create a robust system with players that are either really tough or pretty easily disposable. For the first year or so, I will be actively building soil in the garden beds above the pond. This will involve the addition of lots of organic matter that will need to decompose into healthy soil. As the grey water from the house filters through the decomposing organic matter and down into the pond, it will carry a lot of nutrients with it. I need organisms in there that will filter out those nutrients in a way that is healthy for the aquatic ecosystem.
Those organisms can balance the system until the tilapia arrive, with many of them providing food for the tilapia once they get there. I am sure that the cast of players will change as I do further research and give it more thought, but here is the cast of characters I am currently considering:
1) Water from a real pond - I will find a healthy pond and collect a gallon or so of the water from it. Ideally, it will be a clear pond without obvious signs of pollution or algae blooms or the like. I think I have just the source. This water will carry with it the necessary bacteria, algae, and other microorganisms for treating my water and making it healthy. It will also form the base level of the aquatic food chain, the food chain that will feed off of the nutrients in the water and feed my larger forms of life.
2) Snails - I need to be careful about this one, but I am thinking that aquatic snails will serve as grand decomposers, helping to fill the niche that earthworms take up in soil. They will burrow through and consume the layer of muck that ends up on the bottom of the pond. I just need to make sure that I find a species that is aquatic only and won’t climb the walls at night and eat my plants.
3) Duckweed. From what I understand, duckweed will meet two major needs. It will filter nutrients from the water, cleaning the water. It will also serve as an eventual food source for the tilapia. It reproduces rapidly, so a solid colony of duckweed in place when the tilapia arrive would be a very good thing. There are probably other aquatic plants that I could put in to serve a similar purpose.
4) Crawdads (crayfish) - They are not native to my area, but are very common in the lakes and streams around here. As such, local wildlife managers want rid of them as much as possible, so I have a nearly endless supply. Crawdads will also help consume dead and dying matter, especially animal matter, like dead fish. I am hoping that they will also act as a food source for the tilapia. I’ll have to look into that one. The one note of caution is that crawdads eat fish eggs. Too many, and my tilapia won’t be able to reproduce. That is, unless they can eat the crawdads. It might be a self-balancing system.
5) Guppies - One of my wife’s worries about the tank is mosquitoes. There is a little fish called a mosquito fish that lives almost exclusively on mosquito larvae. Guppies are a close relative and are readily available and inexpensive. They also consume mosquito larvae. Additionally, they are prolific breeders and stay small. There is a good chance that if I got a really healthy population going, they would serve as a good initial food source for the tilapia.
6) Catfish -. This is probably more of a hope than a reality. My real hope is that I can get a system in place such that I don’t have to buy food for the fish. I suspect that if I include catfish in the pond, I’ll probably have to buy food to keep them going. But I know that tilapia eat catfish waste and I know that catfish are bottom feeders, consuming organic matter on the bottom of the pond. So there is hope. Again, research.
7) Plecostomus - I figure one of these will be enough, especially if I can find a big one. He will definitely have to be big enough to not get eaten once the tilapia are introduced. But this guy, along with a little help from the snails, would have the job of keeping the algae down on the sides of the tank and keeping everything clean.
I am sure that there are plenty of other players needed. I will probably need something that will act as an intermediate step between the plankton and the guppies. The food web needs to be complete for the system to function as a whole. I think that even after the soil is complete, there will be enough nutrients washing through the soil to keep the system fed and active.
Once the tilapia are introduced, they should have enough food in the tank to begin reproducing rapidly and producing more fish. Ideally, the tank ecosystem will provide most to all of the food they need. As they get more numerous, I will supplement with black soldier flies, but that is another post.
As a first test of how well such systems might work, I introduced 8 guppies, 4 feeder goldfish, about a dozen tiny snails, and about 4 cone snails to a 55 gallon rain barrel I have on the side of the house. 2 of the feeder goldfish and 1 of the guppies died within the first 48 hours of being introduced to the system. However, the rest of them seem to be thriving despite the fact that I don't feed them. Actually, I do occasionally drop bugs in there to see what the guppies eat. They particularly liked the weed covered in aphids. But I definitely haven’t given them enough to eat that they would survive if they weren’t finding something in the water to eat. The guppies have even reproduced already. I know the tiny snails have as well, because they are already all over the place in there. So I will watch that system for a while and see what I can learn.
Thursday, April 14, 2011
New Ideas for the Future Greenhouse
For those of you who haven't seen my previous posts on the design of my future greenhouse, I recommend you check them out here, here, here, here, here, and here.
Several months ago, I found the website http://gardenpool.org/ and it has me thinking. The way they integrated all those systems into such a small space to get such a productive system is truly inspiring. I had long planned on having a small tank in the corner of my future greenhouse to store water and help work as a thermal mass to mitigate temperature swings. I really liked their idea with the tilapia, but didn't think I had enough space to have my own.
This morning I thought of a new way to do it, and not only does it allow me to have tilapia, but it may actually give me more space to grow my plants and even solve some of the problems I have been struggling with.
The original plan was to pour a concrete slab and seal it. Then I would build cinderblock walls. The problem with this is it doesn't (in my opinion) adequately protect the subsoil from the constant moisture of the floor of my greenhouse. In my area, expansive clays are the norm, and introducing water to expansive clays under your foundation is a recipe for disaster.
Instead of that I would have a contractor come build a swimming pool with some modifications. This would keep the water in very effectively. There would be a drain with a closed valve at the bottom of the "pool" and another with an open valve at two feet up. Also, unlike most pools, the corners would all be square. Then I would build interior walls out of cinderblock with mortar missing from the vertical joints in the bottom course. That would allow water to flow freely from one side of the wall to the other. The interior of the walls, where the plants would eventually go, would be filled with clean sand up to the two foot mark where the water level would be. I would make my growing soil above that. Too much organic soil beneath the water line would cause anaerobic conditions that are not only not healthy, but might actually harm the fish as the water continually flushes from the beds into the pond.
Then I would build a grate two feet up over the path. It would be able to be lifted in sections for maintenance or harvesting of fish. The section under the grate would then be filled with water as a habitat for tilapia. The fish would provide me with a constant source of fresh fish that I could harvest whenever I wanted.
There are several nice things about this. The only space I lose was designated for growing ground cover and mushroom logs. The ground cover, if necessary, could be grown elsewhere. The mushroom logs could, likewise, be grown elsewhere. It frees up the tank I was going to put in the corner for more planting area. It also eliminates most of the rainwater storage tanks I was going to locate elsewhere on the property. It provides a much greater thermal mass, allowing the greenhouse to avoid the huge temperature swings most greenhouses have. It won't get so hot in the summer and it won't get so cold in the winter.
Watering the greenhouse becomes a bit easier. Most of the water would come from greywater that has been filtered through a wetland system elsewhere in the greenhouse and then through the soil. I could also put a pump on a solar panel that would run all day, pumping water out of the pond and cycling it through the soil via a trench irrigation system. This would allow the fish waste to be removed from the fish and used for the benefit of the plants. Also, because the water would be in the lower sand level in the garden, the perennial plants, and even some of the annuals, could put their roots down into the water and get water directly. In effect, it would create a water table about 3' below the surface of the garden.
As I said, I just had this idea this morning, so there are lots of ideas to work out. My wife, ever the devil's advocate, has already provided an extensive list. Will there be mosquitoes? Will it get too hot in the summer and then heat up our attached house, keeping us from being able to cool it adequately? The list goes on. I also have plenty of my own questions and a good start would be to find a good book on how to raise tilapia. Then I need to think on it for a while and make sure I can't come up with any reasons why it won't work.
Several months ago, I found the website http://gardenpool.org/ and it has me thinking. The way they integrated all those systems into such a small space to get such a productive system is truly inspiring. I had long planned on having a small tank in the corner of my future greenhouse to store water and help work as a thermal mass to mitigate temperature swings. I really liked their idea with the tilapia, but didn't think I had enough space to have my own.
This morning I thought of a new way to do it, and not only does it allow me to have tilapia, but it may actually give me more space to grow my plants and even solve some of the problems I have been struggling with.
The original plan was to pour a concrete slab and seal it. Then I would build cinderblock walls. The problem with this is it doesn't (in my opinion) adequately protect the subsoil from the constant moisture of the floor of my greenhouse. In my area, expansive clays are the norm, and introducing water to expansive clays under your foundation is a recipe for disaster.
Instead of that I would have a contractor come build a swimming pool with some modifications. This would keep the water in very effectively. There would be a drain with a closed valve at the bottom of the "pool" and another with an open valve at two feet up. Also, unlike most pools, the corners would all be square. Then I would build interior walls out of cinderblock with mortar missing from the vertical joints in the bottom course. That would allow water to flow freely from one side of the wall to the other. The interior of the walls, where the plants would eventually go, would be filled with clean sand up to the two foot mark where the water level would be. I would make my growing soil above that. Too much organic soil beneath the water line would cause anaerobic conditions that are not only not healthy, but might actually harm the fish as the water continually flushes from the beds into the pond.
Then I would build a grate two feet up over the path. It would be able to be lifted in sections for maintenance or harvesting of fish. The section under the grate would then be filled with water as a habitat for tilapia. The fish would provide me with a constant source of fresh fish that I could harvest whenever I wanted.
There are several nice things about this. The only space I lose was designated for growing ground cover and mushroom logs. The ground cover, if necessary, could be grown elsewhere. The mushroom logs could, likewise, be grown elsewhere. It frees up the tank I was going to put in the corner for more planting area. It also eliminates most of the rainwater storage tanks I was going to locate elsewhere on the property. It provides a much greater thermal mass, allowing the greenhouse to avoid the huge temperature swings most greenhouses have. It won't get so hot in the summer and it won't get so cold in the winter.
Watering the greenhouse becomes a bit easier. Most of the water would come from greywater that has been filtered through a wetland system elsewhere in the greenhouse and then through the soil. I could also put a pump on a solar panel that would run all day, pumping water out of the pond and cycling it through the soil via a trench irrigation system. This would allow the fish waste to be removed from the fish and used for the benefit of the plants. Also, because the water would be in the lower sand level in the garden, the perennial plants, and even some of the annuals, could put their roots down into the water and get water directly. In effect, it would create a water table about 3' below the surface of the garden.
As I said, I just had this idea this morning, so there are lots of ideas to work out. My wife, ever the devil's advocate, has already provided an extensive list. Will there be mosquitoes? Will it get too hot in the summer and then heat up our attached house, keeping us from being able to cool it adequately? The list goes on. I also have plenty of my own questions and a good start would be to find a good book on how to raise tilapia. Then I need to think on it for a while and make sure I can't come up with any reasons why it won't work.
Monday, September 27, 2010
A Bioneer's Greenhouse Part 6 - Ideas

So once I get this greenhouse built, what would I do with it other than grow vegetables? Well, it will still be several years before I get it up and operational, so I have plenty of time to work out the details, but here are a few of my ideas:
Growing Mushroom Logs
In Arizona, the key to growing mushroom logs seems to be 3 things: 1) lots of moisture, 2) keeping them out of the sun, and 3) protecting them at least a little from earthworms. In the greenhouse, I am planning a living path to walk on, with plants growing on it. The water from the beds will drain straight into the soil here, so it should be almost constantly moist, but still have good drainage. It will also be at the base of a 3’ high wall, so it will not get much sun. I can line mushroom logs along the wall and it should be near perfect growing conditions. All I would have to do is bury them about halfway in the soil and leave them alone. It will give me an opportunity to replenish my supplies of a couple of kinds of medicinal mushrooms, grow some new kinds, and grow lots of my favorite edibles. I will also have a lot of great soil for growing some of the types of mushrooms that grow well in soils, such as shaggy manes. I might even be able to get king stropharia mushrooms to grow. That would be quite a coup.
Maintain a Small Ecosystem
My vision has always been to have a complete ecosystem in my greenhouse. Obviously I will have lots of plants and plenty of living bacteria in the soil. I will also put a lot of beneficial fungus in there, from saprophytic fungi making me mushrooms to eat and improving the soil, to mycorrhizal fungi that helps the plants to thrive. But I also want an animal component. I need insects to pollinate my flowers. Windows without screens should do that pretty well. I also need beneficial insects to eat the pest insects that find their way in. That isn’t too hard, though. There is an easy source of vast quantities of ladybugs nearby that I can collect every fall. There are plenty of praying mantis about that I can capture and release in the greenhouse as well.
I also want larger animals in there, though, but what to do? Lizards are easy. I could do anoles, a childhood favorite (but how do I keep them inside?), or I could go the easy way and go with the local whiptails and fence lizards. An iguana, basilisk, or water dragon would be cool as well. Turtles would be cool, but I think I will have too much vertical relief and they don’t really climb. There are also birds. A parrot (I favor macaws) or a small group of bobwhite quail as pets would be cool. Chickens produce eggs. The big problem with birds is that two of the windows to the greenhouse will be my bedroom windows, so noisy birds are pretty much out. There are also some neat mammals that would go well in a greenhouse. Rabbits would produce large amounts of fertilizer, but would have to be kept in a cage if I have any hope of growing anything. The cage could go over the compost pile, though, and add a constant stream of extra nutrients to the greywater headed out to the beds. A sugar glider or flying squirrel would be so cool in there. I just haven’t come to any decisions yet on that. I just want SOMETHING in there.
Water Feature
As I mentioned before, I am going to have some sort of water feature. It won’t be very big, though. Should I make it just a sterile tank, a holding place for rainwater, or should it be a living system? How much room do you need to grow tilapia for food? Maybe I could get native frogs and toads to come in and breed there. Maybe I just have turtles or catfish. There are so many options on this one.
A Wetland Water Filter
I have mentioned before that I plan on using compost to filter my greywater before it heads out to the plants. When I originally planned that one, it was to double as a compost bin for everything but the kitchen scraps. However, I now have a tumble composter that does a really good job of handling just about everything I can throw at it. I don’t necessarily need the extra compost space, so it will be extra effort to keep it full and functional. Wetlands have been used for years to filter water. They are excellent at filtering a large number of impurities from water. It also happens to be an ecosystem that I know next to nothing about but have been very curious about for some time, so it would give me an opportunity to learn and experiment. It also might take less space since the compost bin was supposed to be 2 bins. If I could make the water filtration area smaller, I would have more room to grow more plants.
Carnivorous Plants
I have been a big fan of carnivorous plants since I was a child. The problem is that Arizona is just too dry. Even sitting in a puddle of water, the plants dry out quicker than they can absorb water. A greenhouse might just keep the humidity high enough that they would survive. That would give me an opportunity to grow some of the larger American pitcher plants as well as a variety of sundews and maybe even a Venus flytrap or two. The trick is to keep the water level up. I think I can manage that by putting them in a floating bed on the water feature. I could put it on runners and situate the floats so that it floats at the right height to keep the water level just right. As the water in the tank drops, so does the bed. If I decide not to have any sort of aquatic life in there, this bed could be the entire top of the water feature.
Vertical Gardening
A 10’x20’ space is barely enough to grow everything I want to grow, and sprawling, vining plants, like melons, are just too much for the space. However, if I can create some trellises and arbors, I just might be able to get some of those plants to grow vertically. In addition to saving space, it must might help shade the walls of the house in the summer as well.
Epiphytic Plants
Epiphytes, or air plants, have been another of my loves over the years. Epiphytes grow on other plants, needing no soil. I currently have several epiphytic orchids and bromeliads and would love to expand the collection. In particular, I would love to grow a vanilla orchid, which I hear get very large, and I MUST HAVE a dragonfruit cactus. An epiphytic cactus that produces fruit is just too awesome. Actually, I would love to have a Meyer lemon tree and grow the dragonfruit up the lemon tree. I also really want a staghorn fern. Those are amazing, majestic epiphytic ferns.
Anyway, those are a few of my ideas. As you can see, this greenhouse won’t be so much a greenhouse for me as a bioneering laboratory.
Thursday, September 23, 2010
A Bioneer's Greenhouse Part 5 - Solar

Sunlight is going to be an interesting concern in my greenhouse. Immediately to the east, I will have a screened porch. That means that I won’t get much sun first thing in the morning. Immediately to the west, I have a large juniper tree. That will steal a lot of my evening sun. Since I am facing 22 degrees west of due south, though, I think I should get some really good sun through the rest of the day.
Due to cost considerations, I will most likely have to forego installing the glazing for several years. When I do, though, I have a new set of concerns. I have specifically designed the house for passive solar design. In the summer, I am protecting the house from the sun as much as possible by providing as much overhang and shading as I can to the southern wall. In fact, if you notice, on the house itself, the second floor hangs 2’ over the lower floor. In addition to that, I have a set of wooden slats that give additional shading. During the winter, the sun comes in at a much lower angle, allowing the sun to come in the windows and warm the house. Once I get the glazing up for the greenhouse, I have another source of heat: the greenhouse itself. In the winter, the sun will warm up the greenhouse, producing heat. I will open the upper and lower windows from the house into the greenhouse. As the air heats up, I will rise and enter the upper windows. That will pull air in from the lower windows. This creates a convection current that heats the house. I will also have high and low windows on the glazing for the greenhouse so that I can use the same convection current to dissipate heat to the outside in the summer.
Thermal mass is another big consideration in my greenhouse. Thermal mass is a large, dense structure, such as a body of water or masonry that has the ability to absorb heat. As the day heats up, the thermal mass slowly absorbs the heat, tempering just how hot it can get. By the end of the day, the thermal mass is warm, but the outside temperature starts to cool down. The thermal mass will slowly release that warmth back out. In a house, a thermal mass is stored in the exterior walls, absorbing the heat from the outside and releasing it back to the outside in the summer. Sometimes thermal masses are used on the inside of houses in the form of concrete floors or walls, usually set back enough that they get little to no summer sun, but lots of winter sun.
I will be taking advantage of a high thermal mass in the greenhouse. My raised beds will be constructed of cinderblock. I am also considering using river rock and mortar to create a more aesthetically pleasing façade to the cinderblock. All of this creates a good thermal mass to help the greenhouse hold its heat on cold winter nights. I will also have the water feature in the corner that will provide a lot of thermal mass. I probably won’t want to let the greenhouse suck the heat out of the house on winter nights, so it will need to have a way to keep itself warm. A good thermal mass should do that, releasing the heat close to the plants. I must say, though, that I will be seeing how well this works before putting any temperature sensitive tropical plants in there. In the summertime, I need to find a way to keep the thermal mass from becoming a liability. I am hoping that I can use vines for this. The soil in the path will allow me to grow peas or pole beans or something similar and let it grow up the walls, thereby shading the walls from the sun. Cucurbits growing on top and cascading over the walls would also work. This should help limit the thermal gain in the summer. Also, the sun will be striking the walls at a more oblique angle, which should also help. I will probably use some sort of trellis to protect the side of the house as well.
All in all, I think that the greenhouse will use its sun efficiently and help keep my house warm in the winter. My only worry is that it will also help keep it warm in the summer. I need to prove to myself (and more importantly, my wife) that it will work as needed to keep things from getting too hot in the summer. I think I will probably end up installing an evaporative cooler on the side of the greenhouse as a backup plan. I have also considered having some sort of system that will allow me to have roll-up blinds that I can use to shade the inside of the greenhouse at certain times, or even partially shade it more often. If I get something that is cloth, it could be used as a shade to keep heat out during the summer days and a blanket to keep heat in on winter nights.
Monday, September 20, 2010
A Bioneer's Greenhouse Part 4 - Soil

So now I have talked about how I am going to lay it out and how I am going to get water into and out of the greenhouse. Next I am going to have to have something to grow all that wonderful produce in, some sort of wonderful soil. Now, I could just buy a load of topsoil and hit the ground running. But that would be cheating. For someone who engineers with biology, the soil is by baseline, my starting point, my most important factor. Yes, I need good, fertile soil. But more importantly, I need living soil. For that, I want soil that is almost 100% compost.
I am fortunate to live in the neighborhood I live in. I have a nearly inexhaustible supply of organic material right out my back door. The ecology of my back yard is chaparral, a dry, scrubby landscape dominated by scrub oak. And yes, scrub oak really is oak. It stays small and twiggy and is easily chipped up in my little electric wood chipper. It also grows really densely. I could go out daily and maintain trails, reduce fire danger by removing brush that’s too close to houses, and take it from dense patches. Then I bring the trimmings back to the house and chip them up. Between the sheer amount of scrub oak and how fast it grows, I doubt anyone would ever notice that it was gone. And those that did would probably appreciate my maintenance work. I certainly wouldn’t be clear-cutting anything.
Once home, the chips would be pasteurized and inoculated with culinary mushrooms. Many of the best culinary mushrooms really grow well on oak. So I could grow some in pots or even in the beds themselves. If I can get several blocks completely inoculated with mushroom mycelium, I could create a bed with fresh chips and then break up the blocks and use them to inoculate the bed. With any luck, I would have many pounds of tasty mushrooms as the first crop from my garden. When the mushrooms have gotten what they want out of the wood chips, they get fed to the worms, who will finish them off to make high quality compost in just a month or two.
Now, I have to say that the prospect of harvesting and chipping about 10 cubic yards of scrub oak is seriously daunting. Fortunately, I have a few cheats that allow me to get a quick start. First of all, there is straw. It is a little less dense than wood chips, but it is also readily consumed by a wide variety of culinary mushrooms. A bale is only about $4, so I can get them in bulk pretty easily. So that will probably be my starter method. For my second cheat, I have another readily available resource. During monsoon season, my neighbors and the neighborhood in general spend a considerable effort cutting and removing weeds, especially tumbleweeds. I can just walk around the neighborhood pulling weeds. The green matter will help with the composting as well as improve the nitrogen content of the soil. The best part is that I can use all weeds, regardless of whether they have gone to seed or not. As the raw materials compost, the level of the top of the beds will drop considerably, which means that I will have to keep adding more and more material until the decomposition has slowed down. Assuming I fill it with weeds fairly early in the process, any seeds in the mix will end up so far underground that they will have no chance of pushing to the surface once they sprout.
Once I have gotten the beds a little over half full, I need to start paying attention to the makeup of the soil. I will test it and start looking for amendments. Most of the best soil in the world has one thing in common: it contains large quantities of mechanically weathered rock. The fine rock particles have lots of minerals in them that are readily available to plants. They also have good staying power in the soil. So I will do a lot of looking around at this point and see if I can find a good source of greensand and rock phosphate to supply the potassium and phosphorus I need in my soil. I don’t know of a good rock-based source of nitrogen, so I will probably have to get some blood meal. I will certainly be using lots of compost, which should help. I have some friends with chickens, too, so chicken manure will be added. I will also have to start taking drainage into account around this time. If my soil doesn’t drain well, I will start adding sand or pea gravel to the mix. If it drains too well, I might just add a little unused clumping kitty litter, which will help plug some of the holes and retain water. Clumping kitty litter is made from expansive clay. Caution is recommended with this method, though, as a little goes a long way.
Once I have a fairly decent level of soil that has composted well enough to support plants, I can also plant green manures. Something like alfalfa or hairy vetch would add lots of nitrogen to the soil. I could also begin selectively planting food crops at this point. The greywater distribution system would probably not be fully buried in the soil yet, so any crops that grow food on the ground or in the ground, like zucchini or carrots would be out. However, crops like corn, sunflowers and pole beans that raise their crops well above ground would be a good choice. In addition, these crops produce lots of compost when they are done.
Eventually the final soil level will be reached and will be fairly stable. I fully expect this to take 2-3 years at least. It isn’t until this point that I can consider planting perennials. Any time before that the constant sinking soil level and constant addition of more mulch and compost would be death to anything that would be around a long time.
Thursday, September 16, 2010
A Bioneer's Greenhouse Part 3 - Drainage

In my last entry, I covered how to get water into my greenhouse, but not how to get it out. To be honest, I have put almost as much thought into draining the greenhouse as I have in watering it.
Obviously, the water hits the soil first, so soil is a significant consideration in drainage. I suspect that I will have to do some serious adjusting to my soil mixture for drainage purposes. If I make it drain too well, it will pass the water straight through before the plants have a chance to get any, and no amount of water will be enough. If I make it too dense, it won’t drain fast enough and will always be a puddle, which would kill the plants. They say that if you have clay soil and need better drainage, add organic matter. They also say that if you have sandy soil and need better water retention, add organic matter. It loosens stiff soil so water can penetrate it and it helps absorb water passing through sandy soil to improve retention. Based on this, I am intending on making my own soil almost entirely out of organic matter. I may adjust it a little this way or that with some pea gravel or clay kitty litter if it needs some help.
From there, the water drains down to the bottom of the beds. My plan is to make the floor of the greenhouse concrete. I just don’t want all that water draining right under my foundation. I also don’t want local trees to put some roots up in my greenhouse to steal all my water and possibly damage my beds. So concrete bottom it is. The beds, which will be about 3’ high, will be made of cinder block. On the bottom course of the interior walls, I will leave the mortar out of the vertical joints. This will allow the water to drain from the beds into the pathway. The pathway will also have soil on it, about 8” deep. There will be a perforated pipe inside a sleeve of landscape fabric running the length of the walkway. I will put a cinderblock block with chunks knocked out every 2’ or so along the length of the pipe, straddling the pipe. I will then mortar a stepping stone of some sort to the tops of the cinderblocks. The rest of the walkway will be filled with soil with some sort of shade and moisture tolerant creeping ground cover. Personally, I am hoping for Corsican mint, but to date my attempts to grow Corsican mint have been considerably less than successful. I am also hoping to put some mushroom logs in the pathway there as the shade and moisture will be perfect for them.
So the water trickles down through the soil and then drains to the center of the greenhouse, where it encounters more soil. From there, it drains into a pipe that will take the excess water off to the natural area behind my house. Depending on how much water I have there, and what I can convince the neighborhood of, I might just put in another distribution system and a little orchard of fruit trees. We’ll see.
Monday, September 13, 2010
A Bioneer's Greenhouse Part 2 - Water

This is part 2 of my design for my greenhouse. Part 1 is here.
When I had a nice big garden at my last house, water was a serious source of contention between my wife and me. Though we never did the math, her contention (probably rightly so) was that we spent more money on water than we got in benefit from food. It is just too dry here in Arizona. So in my design for my greenhouse the design of water was crucial. Now it is not to say that I am going to have a low water greenhouse. If that were the case, I would only be growing cactus and such and I really don’t want to do that. No, in this case, the concepts we are going for are wise use of water and a distribution system that reuses water wherever possible. For this, I have a two-pronged approach to water. Yes, I will have a spigot in the greenhouse, but it is my sincere hope that I will almost never have to use it. The vast majority of my water will come from either greywater or rain water.
1) Greywater
Here in Arizona, we have a blanket permit for using greywater. That means that, as an individual homeowner, I have the right to use my greywater without getting an individual permit. I am expecting some friction from the local municipality since they like to use the treated water to recharge the aquifer, but I am a strong believer that it is better to not pull it out and treat it in the first place than it is to pull out twice as much as you need and then put half of it back. Most people I have talked to seem to think I can squeak it through.
There is one problem, though, that becomes a major design concern. The blanket permit has a few stipulations. The one that really affects my design is that you cannot surface irrigate food crops with greywater. Honestly, this just makes sense. Whatever dirt you just washed off your hands shouldn’t end up back on your food. So I am taking a two-pronged approach to this problem. The first prong is to filter the water to get as much out as possible before it waters my plants. That should get rid of the hair and dirt and a lot of the soap before it gets distributed to the plants. To do this, I am going to use compost to filter it. The exit of the greywater system will be right next to the back door. The line will run under the sidewalk and dump straight into the compost. The compost bins will be fairly shallow and despite not being shown this way in the drawing (one level of detail I didn’t feel like doing), will be a little above the rest of the beds.
There will be two compost bins with a filter cloth of some sort between them. The water will flow into the first bin, flooding it, and then trickle into the second bin. From there it will trickle into a filtered tub in the corner where it will enter the distribution system. Since I have a dog and don’t want the greenhouse to be smelly anyway, the compost used for filtration will be strictly a repository of wood chips and plant waste from the greenhouse, with no food waste in it. I’ll try to put living mushroom mycelium in there to help with filtration, but I anticipate difficulties keeping it alive for very long. This will mean a non-smelly compost that has lots of microorganisms in it to help grab the nutrients out of the water. It will also mean that the water leaving the compost bins will be a sort of weak compost tea that will be composed of very little leachate.
The distribution bin will have two outlets, one that goes to the central bed and one that goes to the outer beds. From there, the pipe will run along the inside of the wall of the bed that is next to the path, about 6” below the surface of the dirt. There will be an outlet with a valve every two feet or so along the edge. That should give me a fairly even distribution of the water. If I have an area that is not planted or getting too much water, I can turn off zones as I need to.
One of the problems I have struggled with is the even distribution of water. If each outlet was at the same elevation, the dirt at the beginning of the system would get most of the water and the end of the line would get almost none. I plan to remedy this problem by having an inch or two rise between the bottom of the distribution pipe and the outlet of each outlet pipe. That way the pipe fills up before it starts to distribute water, so it should distribute fairly evenly.
The distribution system for the central bed will be similar to the one for the outer bed.
2) Rain Water
I am going to do my best to capture as much rain water as I can for the greenhouse. I am hoping to bury some sort of tank on the northwest side of the house that captures rain from at least half of the roof of the house. 300 to 400 gallons would be good, though I am going to try for as much as I can. I am also planning on putting some sort of water feature on the northwest corner of the greenhouse, though I haven’t decided what form that will take yet (just a big tank or a living system?). The overflow of the large house tank will go to the greenhouse tank to make sure it is full. From there, the overflow of the greenhouse tank will dump into a terracotta channel mounted along the edge of the outer raised bed wall. This terracotta channel will be grouted to the wall and tilted towards the soil. Assuming I can get it all level, it will fill up and then spill over into the dirt, acting sort of like a trench irrigation system without using any of my precious growing space.
A rainwater source and distribution system will be crucial to this working. Since I can’t surface irrigate with greywater, I need a way to water seedlings and other plants whose roots don’t go deep enough to take advantage of the greywater. The water feature will also have a spigot on the side for filling a watering tank. Then I can just top off the greenhouse tank with water from the house tank.
Ideally the combination of the two systems will serve to keep the greenhouse watered without too much effort from me and almost no use of additional city water. In fact, I did some research on how much the average household produces a day, and they say about 35 gallons of greywater per day per adult. Now we are pretty water conscious, so I’d say we are under that. However, with two adults and two kids, we’ll probably still generate about 50 gallons of greywater a day. That is probably more than I need. I might just have to turn the valve off half of the time and give the City its recharge water back.
Thursday, September 9, 2010
A Bioneer's Greenhouse Part 1 - Overview

As a teenager, I discovered the joys of making terrariums. I started out trying to make a comfortable habitat for my pets, but it quickly became more about the habitat and less about the pets. That was the beginning of my love of engineering biological systems. As an adult, I realized that a greenhouse would be a terrarium for me and it became a goal to have one of my very own. But I didn’t want just any greenhouse. I wanted something intricately designed, efficient, self-sufficient wherever possible, and above all else, customizable. It would be a place where I could try out new ideas, tinker, and change things to make them work better.
A few years ago my wife and I bought a lot with the intent of building a house on it. Now that we are living in a rental unit on the lot next to our house and finally have our old house rented out, it is time to work towards building the new house. Naturally, the new house will include a greenhouse, though I suspect that the actual glazing will probably come along later. In the meantime, it will be a raised bed garden.
In the interest of making this a blog post and not a book, I’ll break up my design and intention for the greenhouse into parts. For starters, though, I’ll talk about the site layout.
The lot is kind of what we in Prescott call a “billygoat lot.” It is on a fairly steep hill and only covers 0.06 acres. Yes, I have the decimal point in the right place. The neighborhood is laid out with lots of open space and very small lots. That suits me just fine. As luck would have it, the lot slopes down to the south and the road is on the north side. I have about 15’ of fall from the front of the lot to the back. That means that when you walk in the front door off the street you are in the upper floor of the lot. Going down a floor and walking out the back still leaves you three to four feet above ground, just enough that I can put in a raised bed garden and still water it with greywater from the house. It also puts it in a good place to collect rainwater from the roof.
The greenhouse will be located on the southwest corner of my house and will be 10’ deep and 20’ wide. There will be a door into the house on the northeast corner of the greenhouse and the path into the greenhouse will start there with steps. There will be a 3’ wide bed all the way around the outside of the greenhouse, with a 2.5’ path next to it. On the inside will be a wider, deeper bed. There will be room for a bench as well.
Over the next several posts, I will cover the features of my future greenhouse, starting with water and drainage, then covering soil production and solar features, and finally ending with a discussion of some of the living systems I am hoping to build into the greenhouse once I get it fully built, glazed, and operational.
Subscribe to:
Posts (Atom)