Monday, December 12, 2011

Epiphytes – On a Stick!

Life has been crazy lately, leaving me with little time to do what I love. So when an opportunity, well, need really, presented itself, I jumped on it with gusto. I recently moved to a new house, with different window configurations and different layout. I suddenly found myself with one great window to put plants in. It got better sun than what I had before, but it only really had room for one big plant. We have a great porch right now as well, with lots of room and good sun exposure, but winter has set in, leaving all my tropicals inside. Add to that the overgrown nature of my dragonfruit seedlings and something needed to be done.

The obvious choice for occupancy in the window was my Meyer lemon tree. I mean, the thing is actually producing lemons for me and I have a prominent place set aside for it in my future greenhouse. I have great plans for it, including its job as a future scaffolding for my dragonfruit cactus and possible grafting to produce a citrus fruit salad tree. Anyway, the survival of this tree was paramount. But it was living in a pot that was big enough for some friends, so I saw the opportunity for a project.

As I have mentioned previously on this blog, I sprouted a large number of dragonfruit cactus about a year ago and the germination rate surprised me. My estimates were that the three pots held around 90 cactus seedlings. Eventually I need only two. I had repotted one of the pots and some of the relocated plants got very large very quickly. So I had about 60 small seedlings and about 5 large ones. I really only needed to save a couple and get rid of the rest. They were beginning to sprawl. Again, an opportunity for a project.

So I cut a 5’ branch from an elm tree and stripped the branches. Then I got some coir (coconut fiber) fabric from the local pet store and cut it into strips. I wrapped the coir in a spiral strip up the log, nailing it into place at the end of one strip and the beginning of the other. Then I chose the two best dragonfruit seedlings and planted them at the base of the stick. I did my best to train them up the stick, holding them in place with fishing line. Eventually the dragonfruit will begin to produce aerial roots and the coir will provide the perfect substrate for them to grow onto, attaching firmly to the stick.

After I got all that done, I noticed that the spiral wrap of the coir left me some space between the coir and the stick. Of course, if I had thought of this at the outset, I probably wouldn’t have wound it as tightly as I possibly could. It occurred to me that I had a couple of epiphytes that were also in need of a new home.

Years ago I created a very large mushroom log and loaded it up with epiphytes, the concept being that as I misted the epiphytes, I would also be misting the log. Some of the epiphytes have since been moved to soil, where they are happier. Others have died. The log has stopped producing mushrooms. I was down to two lonely Tillandsias, a Tillandsia bulbosa and a Tillandsia caput-medusae, and two tiny strands of Spanish moss (which, coincidentally, are Tillandsias as well) and all had seen better days. Tillandsias like bright light and I knew that they wouldn’t do well in their new home far from a bright window, so I decided to move them to the stick.

With a little tugging and pulling, I was able to make enough space to put my epiphytes on the log. Both Tillandsias fit nicely, but hardly filled all the space. So I took the opportunity to break off a few pseudobulbs from my Encyclia bractens orchid, a happy epiphyte, even in my dry climate, and attached them as well.

The end result is my new happy place. That my new project happens to be in a sunny window next to a comfortable chair is a great boon to me. I can sit there after a hard day, or even at the beginning of a hard day, and feel some calm. I really need that right about now. It has been sorely lacking in my life.

Now to find time for the next project: that old spent mushroom log needs some work. I think I am going to take a dremel tool and hollow out the wood on the top until I get to the soft, pulpy wood inside. Then I’ll fill it with soil and plant something in there. Maybe a little water access to the middle will encourage bits of fungi still living in the center of the log to come back to life and I’ll get a few more mushrooms from it. Or not. That would be fine too.

Monday, September 5, 2011

Balancing an Aquatic Ecosystem - Animals

Lately I have been planning out how to balance the aquatic ecosystem in my future aquaculture greenhouse. It is a tricky concept to try to produce a significant amount of food out of a tank that is somewhere between 1100 and 2500 gallons and still have a self-regulating system. The important part is to set up a stable food web.

The thing to remember about food webs is that the base, your plants (in this case phytoplankton and duckweed), is limited by the input of nutrients and the size of the system. It can only get so big. From there on up the food web, each successive level gets smaller . If you have too many levels and you eat from the top, you don’t get much food, so the ideal food fish is capable of filter feeding on the phytoplankton. It just so happens that tilapia are just such a fish. However, I never can leave well enough alone, so I don’t want a simple system. I want an elegant, interesting system.

Currently I am considering a combination of three larger species in the tank: mosquitofish, crawdads (or as some people call them, crayfish), and tilapia. I am thinking that the three will probably work pretty well together in there.

The tilapia will obviously be the star of the show. Blue tilapia are omnivores and eat a mixture of plant and animal material. They will primarily feed on the algae and duckweed or other plant material I drop in there from the garden, but are also known to occasionally eat small fish (like mosquitofish), small invertebrates (perhaps juvenile crawdads), mosquito larvae, and other zooplankton. Since the whole system is designed to support these fish, I obviously don’t want to seriously endanger them with predators. However, considering how prolific tilapia are as breeders, many commercial producers introduce predators to keep the population at a manageable level. Crawdads are known to occasionally take small fish and often eat eggs. However, the tilapia brood their eggs in their mouths for protection, so I am not too worried about the eggs. I think that a few fry lost to crawdads wouldn’t be a problem.

Crawdads will be the cleanup crew. They mostly eat rotting vegetation and animal matter. So if a fish dies, the crawdads will probably eat it, meaning I won’t have to clean it up. I still need to do a little more research on that one to make sure it is the case. Plus, crawdads are edible, so they make another, smaller food source. Many crawdads climb up on banks to reproduce and I don’t have banks, only walls. That means they not reproduce, which may be a problem. If it is the case, I have an ample supply of invasive crawdads in the lakes and streams in my area. I’ll just need a trap. The biggest problem with crawdads, in my mind, is getting rid of them if I find out they are harmful to the ecosystem I have set up. Even if I drain the whole pond and leave it dry for a few weeks and start over, it may not completely get rid of them. The pond isn’t designed to drain completely and the plants above will be constantly leaking water into the pond area as I water them.

The mosquitofish are relatives of guppies, only much, much tougher. They do very well surviving high water temperatures, low oxygen content, and poor water quality. They are also prolific breeders and will probably fill the pond pretty quickly. Their diet consists mainly of insects, insect larvae (like mosquito larvae), and zooplankton. There is a bit of overlap between the diets of the tilapia and the mosquitofish, so I am a bit worried that there will be more competition for food going on there than I want. However, the baby mosquitofish, which are born live, will serve as a food source for the tilapias, so it probably won’t be a problem. I am not sure if the tilapias will eat the adult mosquitofish or not. The crawdads almost certainly will, though, and that means that a lot of the little fish that the crawdads take from the water would actually be mosquitofish rather than baby tilapia, which will help give a little school protection to the baby tilapia. Ultimately, the mosquitofish would serve more as another food source for the tilapia than mosquito protection, though that benefit would be good as well.

The mosquitofish and crawdads are probably pretty unnecessary to the operation of the greenhouse, overall. The only necessary function they perform is as cleanup crew of dead fish. That and an opportunity to allow me to watch and tune a functioning aquatic ecosystem right inside my greenhouse.

Monday, August 29, 2011

Aquaculture Greenhouse: The Sand Filter

I recently found out that a new coworker is something of an expert on setting up large aquariums and their filtration systems. This is something of a boon to me, since I don’t know a lot about it and am currently doing lots of research to fill the cavernous gaps in my knowledge. I only got to talk to Mike for about 5 minutes on the subject, but he already found a big flaw in my plan. Fortunately, I think it is one I can fix.

As I mentioned in a previous post, I am planning on flooding the lower two feet of my future greenhouse and growing fish under the path between beds. The goal is to create a balanced aquatic ecosystem. Ideally, the organic compounds that leach out of the soil or come from the greywater will be enough to feed the phytoplankton in the water, which will then become the base of the food chain in my tank.

The problem Mike found is in my soil. My garden beds, which will extend 3’ above the water level, will be made entirely of organic matter, with minor amounts of sand and pea gravel thrown in for soil structure. Organic matter that is below the water line can be a problem, though, as it will undergo anaerobic decomposition and pollute the water with toxic chemicals. My solution was to fill the area under the soil with sand.

According to Mike, any sort of filter for biologically alive water will quickly fill with a sort of slime. It is a good thing, as it really helps filter the water. However, it will grow to fill the pore spaces to the point where no water will get through and the water will back up and drown my plants. The only way to stop this from happening is to stir the sand every couple of months to break it up. This is obviously not an option as the sand will be underneath 3’ of productive garden soil.

My first thought was to come up with some sort of tray system. The weight of the soil above makes horizontal trays too cumbersome to deal with, so I thought vertical trays every few feet might solve that problem. That still requires a structure around it to enable me to pull it out and there are lots of ways that could go wrong.

Another option would be to just put drains every few feet just above water level. That way, when it plugs, there is an overflow drain that would continue to function. This is still a very viable option, but I really don’t like it much. When the sand is completely plugged, it becomes not only unusable space under the soil, but also stagnant and anaerobic. I am not fond of that plan.

Then it occurred to me that the primary purpose of the sand was not as a filter, but as a spacer, keeping organic soil above the water line. What if I used something else as a spacer instead. The soil will still do most of the filtering necessary, so the sand isn’t really needed. The product that comes to mind most quickly is a system of grids that are used for rainwater retention systems. They are made of a stiff plastic and are designed to hold a lot of weight while still having a lot of open volume for water storage. If I could put those in there and a layer of landscape fabric on the top, I would have something that would most likely not plug and would increase the amount of water I could hold in there considerably. Of course, there are other structural features I could use. I could go all Roman aqueduct on it and use stone arches. That would be pretty cool and would last forever. It would probably be cheaper as well. Stacked cinderblocks would probably also work, but wouldn’t leave as much room for water.

So far, the open water solution is my best. It increases the volume of water for the fish to swim in from 1100 gallons to around 2500 gallons. But that leaves me with a new dilemma. What organisms do I allow to access that area. It will be very difficult to get in there to do any kind of maintenance, so anything that dies in there stays in there. Also, if I decide that a particular organism is a pest, I will really never be able to clean it out of the system without draining the pond and starting over. The cavern also gives the fish a good hiding place, which may or may not be a good thing.

I love this process.

Thursday, August 25, 2011

Aquatic Systems of Life

Ever since I was a kid, my hobby has been creating terrestrial systems of life. The trick with creating good ones is to balance the cycling of nutrients through the system such that the beneficial organisms out compete the disease-causing organisms. In terrestrial systems, you have a plant to cycle water and oxygen and provide a centerpiece. In larger systems it can also provide food. You have a fungus to decompose decaying plant material. I prefer mushrooms because they also provide food, even in small systems. Earthworms till the soil and decompose vegetative and fungal matter. Beneficial bacteria take up most of the rest of the niches. In order to keep the system healthy, a regular infusion of organic matter is about all that is required. Without the mushrooms and earthworms, disease and pest organisms, such as gnats and disease-causing bacteria and fungus can get in and dominate the system, reducing the health.

After my big idea of creating a stock tank with tilapia in it a few months ago, I am considering a foray into the creation of aquatic systems of life. First of all, let me say that I don't know a lot about it. Yet. I do need to find two good books. The first needs to be on aquaculture. The second will need to be on how to create and balance aquatic systems of life. If any of you have any good suggestions, I would certainly appreciate them.

The basic need of aquatic systems is going to be the same as in terrestrial systems. The flow of nutrients through the system is going to be crucial. However, in aquatic systems, the balancing of this system is much more important than it is in terrestrial systems. Water is a much more robust system for life to flourish in, so algal or bacterial blooms that could potentially be harmful can happen in a matter of  days rather than weeks like they would in soil. First of all, fungal allies are out of the picture, so other players need to be introduced to do a lot of the decomposition quick enough that the harmful bacteria don't get to it.

Right now, I am thinking that the first step to creating the pond at the bottom of the greenhouse will be to create a robust system with players that are either really tough or pretty easily disposable. For the first year or so, I will be actively building soil in the garden beds above the pond. This will involve the addition of lots of organic matter that will need to decompose into healthy soil. As the grey water from the house filters through the decomposing organic matter and down into the pond, it will carry a lot of nutrients with it. I need organisms in there that will filter out those nutrients in a way that is healthy for the aquatic ecosystem.

Those organisms can balance the system until the tilapia arrive, with many of them providing food for the tilapia once they get there. I am sure that the cast of players will change as I do further research and give it more thought, but here is the cast of characters I am currently considering:

1) Water from a real pond - I will find a healthy pond and collect a gallon or so of the water from it. Ideally, it will be a clear pond without obvious signs of pollution or algae blooms or the like. I think I have just the source. This water will carry with it the necessary bacteria, algae, and other microorganisms for treating my water and making it healthy. It will also form the base level of the aquatic food chain, the food chain that will feed off of the nutrients in the water and feed my larger forms of life.

2) Snails - I need to be careful about this one, but I am thinking that aquatic snails will serve as grand decomposers, helping to fill the niche that earthworms take up in soil. They will burrow through and consume the layer of muck that ends up on the bottom of the pond. I just need to make sure that I find a species that is aquatic only and won’t climb the walls at night and eat my plants.

3) Duckweed. From what I understand, duckweed will meet two major needs. It will filter nutrients from the water, cleaning the water. It will also serve as an eventual food source for the tilapia. It reproduces rapidly, so a solid colony of duckweed in place when the tilapia arrive would be a very good thing. There are probably other aquatic plants that I could put in to serve a similar purpose.

4) Crawdads (crayfish) - They are not native to my area, but are very common in the lakes and streams around here. As such, local wildlife managers want rid of them as much as possible, so I have a nearly endless supply. Crawdads will also help consume dead and dying matter, especially animal matter, like dead fish. I am hoping that they will also act as a food source for the tilapia. I’ll have to look into that one. The one note of caution is that crawdads eat fish eggs. Too many, and my tilapia won’t be able to reproduce. That is, unless they can eat the crawdads. It might be a self-balancing system.

5) Guppies - One of my wife’s worries about the tank is mosquitoes. There is a little fish called a mosquito fish that lives almost exclusively on mosquito larvae. Guppies are a close relative and are readily available and inexpensive. They also consume mosquito larvae. Additionally, they are prolific breeders and stay small. There is a good chance that if I got a really healthy population going, they would serve as a good initial food source for the tilapia.

6) Catfish -. This is probably more of a hope than a reality. My real hope is that I can get a system in place such that I don’t have to buy food for the fish. I suspect that if I include catfish in the pond, I’ll probably have to buy food to keep them going. But I know that tilapia eat catfish waste and I know that catfish are bottom feeders, consuming organic matter on the bottom of the pond. So there is hope. Again, research.

7) Plecostomus - I figure one of these will be enough, especially if I can find a big one. He will definitely have to be big enough to not get eaten once the tilapia are introduced. But this guy, along with a little help from the snails, would have the job of keeping the algae down on the sides of the tank and keeping everything clean.

I am sure that there are plenty of other players needed. I will probably need something that will act as an intermediate step between the plankton and the guppies. The food web needs to be complete for the system to function as a whole. I think that even after the soil is complete, there will be enough nutrients washing through the soil to keep the system fed and active.

Once the tilapia are introduced, they should have enough food in the tank to begin reproducing rapidly and producing more fish. Ideally, the tank ecosystem will provide most to all of the food they need. As they get more numerous, I will supplement with black soldier flies, but that is another post.

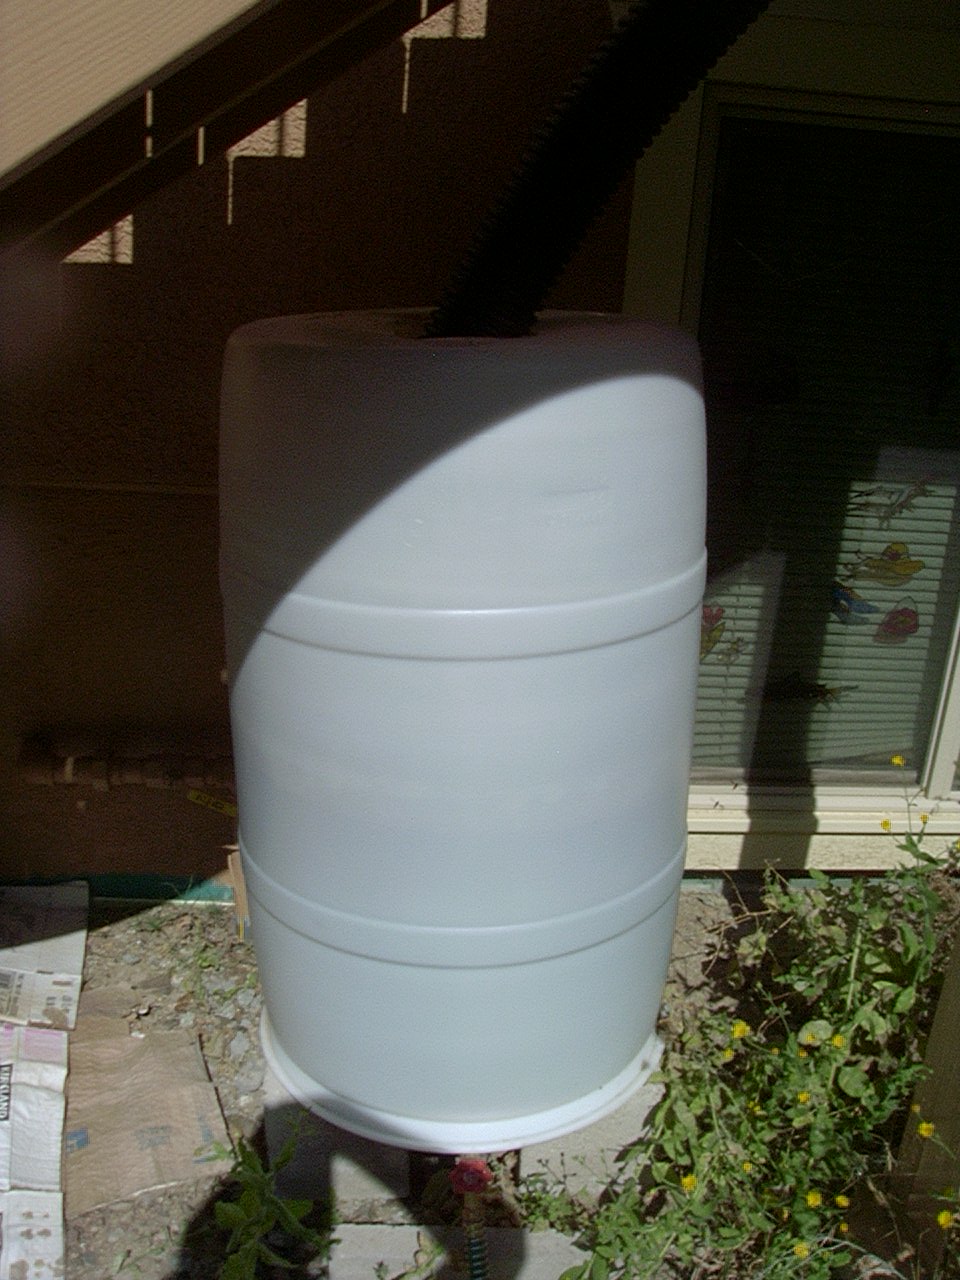
As a first test of how well such systems might work, I introduced 8 guppies, 4 feeder goldfish, about a dozen tiny snails, and about 4 cone snails to a 55 gallon rain barrel I have on the side of the house. 2 of the feeder goldfish and 1 of the guppies died within the first 48 hours of being introduced to the system. However, the rest of them seem to be thriving despite the fact that I don't feed them. Actually, I do occasionally drop bugs in there to see what the guppies eat. They particularly liked the weed covered in aphids. But I definitely haven’t given them enough to eat that they would survive if they weren’t finding something in the water to eat. The guppies have even reproduced already. I know the tiny snails have as well, because they are already all over the place in there. So I will watch that system for a while and see what I can learn.

Friday, July 15, 2011

Testing the Soil

As I have mentioned here before, I currently garden in containers. One of the challenges of container gardening is that the reservoir of available nutrients is much smaller than it is in the ground. If you have mycorrhizal fungus in your in-ground garden, it will search out far and wide for available nutrients to gather for your plants. In a container, the plants and mycorrhizae alike are limited to what is in the container’s soil.

When I made the soil, I used good quality compost. As the plants were growing, I added good fertilizer. I specifically looked for fertilizer that had rock phosphate and greensand. Both are hard to find, but both are rock-based sources of potassium and phosphorus. They should have good lasting power in the soil. There is no such thing as a rock-based source of nitrogen, though, so I had to look for other solutions. Last summer, when I was fertilizing the soil, I made extra care to add blood meal in addition to the general purpose fertilizer. Blood meal is a great source of nitrogen, even though it doesn’t necessarily have much lasting power in the soil.

Last fall I began noticing a little slower growth in my plants. This spring, it almost slowed to a crawl. My seedlings were slow to sprout, slow to come up, and glacial in their growth. All but the peas, that is. Peas, along with the bacteria they culture on their roots, have the ability to fix atmospheric nitrogen on their own. It seemed a sure sign that my soil was lacking something, probably nitrogen. It was time to break out the soil test kit.

I got a Rapitest kit that tests for pH, nitrogen, phosphorus, and potassium. Testing each pot for all 4 numbers took a while, but it was well worth it for the information gained. For those of you who haven’t used chemical soil tests, the use is pretty easy, and not too time consuming. You dig down about 3-4 inches in your soil and get about a cup of soil, sometimes mixing from a couple of different places if you are testing a larger area. Then you mix the soil with distilled water (I used filtered, which might have thrown off my results a little, but not much.) per the package directions and shake really, really well. Then you let the soil settle out, which usually takes 10-30 minutes unless you have clay soil, which might take a couple of hours. Then you dump the powder for the test you are about to perform into the provided vial and fill to the line with your test water. Shake for a few seconds and then let it sit for about 30 seconds. Then you just compare to the colors on the vial to see how much of each nutrient you have.

As expected, every single one of my containers tested as depleted or nearly depleted in nitrogen. Oddly enough, though, each one had more than adequate, even excessive, amounts of phosphorus and potassium. They also tested in the general range of neutral in pH. A couple were slightly alkaline and a couple were slightly acidic, but all were pretty close to neutral.

Now all I need to do is get some nitrogen in there so my plants can grow with wild abandon!

Friday, July 8, 2011

GeekDad: The Best Garden Supplement Is as Natural as Your Plants

I have a new blog post up at GeekDad this morning. It is all about mycorrhizal fungus. You can check it out here.

Thursday, July 7, 2011

Hugelkultur

I have grown many mushroom logs over the years and, like any good composter, hate to throw them away when they are spent. It is still a good source of carbon and minerals and not to be wasted. I usually chop them up roughly and throw them in the compost bin, where they tumble for some time, very slowly getting smaller. When I redo one of the containers in my garden, I find I am often short on soil (due in large part to my dislike of store-bought potting soil), so I throw a chunk or two of the decomposing log into the bottom of the pot to fill space. I figure the log will slowly decompose over several years time. During that time, it will feed the soil and provide a reservoir of nutrients.

Recently, I came upon a method of soil-building called hugelkultur. The basic premise is that decaying wood harbors a great diversity of life. If you see a fallen log in the forest, it is covered with different organisms. The older the wood, the more life there is. So, according to hugelkultur, when building soil, you bury wood in the soil. The wood provides both shelter and food source for a wide variety of life. Over the course of several years, the wood will break down into a rich soil that is full of organic matter and many nutrients.

When a mushroom log is good and spent, the interior is spongy and soft. They are easily chopped up into smaller chunks with a large knife. When putting together a new pot full of soil, I like to put a layer of well-draining material on the bottom, like sand or rocks, and then a layer of roughly chopped spent mushroom logs on top of that. I mix it in well with some good compost and then make sure I have three to six inches of dirt on top of the wood. This gives new plants plenty of room to spread their roots without running into wood immediately. While a plant can push its roots through mostly rotted wood, it may have difficulty with some of the harder portions or if you use fresher wood.

Thus far, I have only found two difficulties with hugelkultur. The first is that rotting wood is low in nitrogen. This means that your soil will most likely be low in nitrogen, too, so other sources, such as blood meal, compost, and nitrogen-fixing plants are a good idea as your soil matures, especially if you are going to be growing plants that need lots of nitrogen, like fruits and vegetables.

The second problem is that wood is high in carbon, which mostly gets converted to carbon dioxide as it decomposes. This is good for your plants, providing a slow, steady supply right where they need it. However, that carbon all takes up space. This means that the level of your soil will slowly drop as time passes, sometimes by several inches. This is great for annual plants, as it gives you lots of room to add compost. However, it can be bad for perennials as they slowly get buried in the compost you have to add.

Overall, though, I really like it as a method for bulking up soil in a new bed or container. I especially recommend it for mushroom growers, like me, who have lots of spent logs laying around that they don’t want to throw away.

Monday, June 27, 2011

Amazing Nature: Lobster Mushrooms

Most people think of mushrooms in terms of “poisonous” and “edible.” There, is, however, a much larger third category that can best be called “inedible.” Inedible mushrooms are not poisonous, but still cannot be eaten because they are too small, too fragile, too tough, or just unpalatable. They just have no culinary value at all.

This is where the lobster mushroom comes in. It is not actually a mushroom at all. It is a parasitic mold. As an inedible mushroom (often members of the Lactarius or Russula family) reaches maturity, the red mold infects the mushroom. It takes over the mushroom’s functions and uses them for its own functions, covering the entire outside of the mushroom, turning it red like a lobster. Most interestingly, the process turns a normally inedible mushroom into a choice edible.

Photo courtesy Joe Mabel via Wikipedia licensed under a Gnu Free Documentation License.

Friday, June 24, 2011

GeekDad: Better Pest Control Through Biology

I have another blog post up on GeekDad. This one talks about Paul Stamets' use of, and patent for, the use of cordyceps mushrooms as an in-home alternative to traditional pest control. You can check it out here: http://www.wired.com/geekdad/2011/06/better-pest-control-through-biology/

Wednesday, May 18, 2011

Maker Faire

I will be at the Maker Faire in the Bay Area this weekend, so if any of you are there, look me up. I will be spending most of my time at the GeekDad booth, so come talk to me!

Thursday, April 14, 2011

New Ideas for the Future Greenhouse

For those of you who haven't seen my previous posts on the design of my future greenhouse, I recommend you check them out here, here, here, here, here, and here.

Several months ago, I found the website http://gardenpool.org/ and it has me thinking. The way they integrated all those systems into such a small space to get such a productive system is truly inspiring. I had long planned on having a small tank in the corner of my future greenhouse to store water and help work as a thermal mass to mitigate temperature swings. I really liked their idea with the tilapia, but didn't think I had enough space to have my own.

This morning I thought of a new way to do it, and not only does it allow me to have tilapia, but it may actually give me more space to grow my plants and even solve some of the problems I have been struggling with.

The original plan was to pour a concrete slab and seal it. Then I would build cinderblock walls. The problem with this is it doesn't (in my opinion) adequately protect the subsoil from the constant moisture of the floor of my greenhouse. In my area, expansive clays are the norm, and introducing water to expansive clays under your foundation is a recipe for disaster.

Instead of that I would have a contractor come build a swimming pool with some modifications. This would keep the water in very effectively. There would be a drain with a closed valve at the bottom of the "pool" and another with an open valve at two feet up. Also, unlike most pools, the corners would all be square. Then I would build interior walls out of cinderblock with mortar missing from the vertical joints in the bottom course. That would allow water to flow freely from one side of the wall to the other. The interior of the walls, where the plants would eventually go, would be filled with clean sand up to the two foot mark where the water level would be. I would make my growing soil above that. Too much organic soil beneath the water line would cause anaerobic conditions that are not only not healthy, but might actually harm the fish as the water continually flushes from the beds into the pond.

Then I would build a grate two feet up over the path. It would be able to be lifted in sections for maintenance or harvesting of fish. The section under the grate would then be filled with water as a habitat for tilapia. The fish would provide me with a constant source of fresh fish that I could harvest whenever I wanted.

There are several nice things about this. The only space I lose was designated for growing ground cover and mushroom logs. The ground cover, if necessary, could be grown elsewhere. The mushroom logs could, likewise, be grown elsewhere. It frees up the tank I was going to put in the corner for more planting area. It also eliminates most of the rainwater storage tanks I was going to locate elsewhere on the property. It provides a much greater thermal mass, allowing the greenhouse to avoid the huge temperature swings most greenhouses have. It won't get so hot in the summer and it won't get so cold in the winter.

Watering the greenhouse becomes a bit easier. Most of the water would come from greywater that has been filtered through a wetland system elsewhere in the greenhouse and then through the soil. I could also put a pump on a solar panel that would run all day, pumping water out of the pond and cycling it through the soil via a trench irrigation system. This would allow the fish waste to be removed from the fish and used for the benefit of the plants. Also, because the water would be in the lower sand level in the garden, the perennial plants, and even some of the annuals, could put their roots down into the water and get water directly. In effect, it would create a water table about 3' below the surface of the garden.

As I said, I just had this idea this morning, so there are lots of ideas to work out. My wife, ever the devil's advocate, has already provided an extensive list. Will there be mosquitoes? Will it get too hot in the summer and then heat up our attached house, keeping us from being able to cool it adequately? The list goes on. I also have plenty of my own questions and a good start would be to find a good book on how to raise tilapia. Then I need to think on it for a while and make sure I can't come up with any reasons why it won't work.

Thursday, March 17, 2011

"As Soon As The Soil Can Be Worked" for the Southwest

Note the worn leaves being replaced by dark green ones.

Well, spring is upon us again, and it is time to plant the spring garden. For those of you who live back east, just follow the directions on the seed package: “As soon as the soil can be worked.” Quite simply, that means that once the snow has melted, the ground has thawed out and the extra moisture from the snow has drained off, you can plant. Working in muddy ground destroys the structure of the soil and should be avoided.

I, however, live in the mountains of Arizona. I garden in Zone 7, so I still have distinct winters. Before living here, I lived in Boulder, Colorado. In both areas, winters are fairly inconsistent. Some days are bitterly cold while others are warm and mild. I have at least several days, if not weeks at a time, all through the winter when the soil can be worked. It is not uncommon to have days in December or January where you only need a light jacket. Here in Arizona, there are only a handful of days a year when the temperatures don’t get above freezing. That certainly doesn’t mean I can plant my spring garden in the fall or early winter, though.

Through the coldest part of the winter, the temperatures will often get down into the low 20s every night with occasional dips into the teens or lower. Highs in the 40s during the day don’t make up for this daily cold snap and even the hardiest plants go dormant during this period.

So, if the “as soon as the soil can be worked” that the seed packets usually tell us doesn’t work for my climate, how do I know when I can plant my spring crops? Well, there is usually a turn in the weather in late winter. Suddenly there are warm days, days when you don’t even need a coat. While nights are below freezing, they rarely get down into the range of a hard freeze. While there will be many more freezing nights, and even a couple more hard freezes, your spring plants can usually handle this weather.

So, what are some signs you can look for to tell when it is safe to plant your first vegetables? Personally, I use spinach as an indicator plant. Every single time I have planted it, it lives through the winter, even in Colorado. But it does so in a sort of dormant state. When the first warm weather of spring hits, it springs to life and starts growing rapidly. There are also plenty of other indicators, though. Daffodils come up at the first sign of spring. Irises grow. Coats are shed. Trees begin to bud. These are all signs that the coldest nights are past and spring is coming. So plant away. Your spring veggies are so named because they can handle a little frost when they are young.

Just don’t let the warm weather fool you. Frost-intolerant summer crops, like tomatoes and squash, still have a couple of months before they can safely be planted outside.

Monday, March 14, 2011

Wood Chip Mushroom Spawn

If you buy any kind of mushroom kit online, except portabella, it will most likely come in the form of a 5lb block of wood chips grown through with mycelium. The reason for this is simple. Wood chips are easy to colonize for mushrooms, a nutritious food source, and a convenient medium for transfer. One of the best things about growing mushrooms on wood chips is that they can be fruited up to three times and then used to transfer mushrooms to a new substrate. In fact, it really doesn’t matter (for most mushrooms, that is*) whether you bought the block for transferring mycelium to a new medium or for producing mushrooms. It can first be fruited and then broken up and used as spawn.

Growing mushrooms on wood chips is pretty easy. First you need to match the wood with the preferences of the mushroom. Then you need to get the wood into the right form. Sawdust tends to be to fine and packs a bit too tightly for optimal mushroom growth. Large wood chips tend to have too much air flow for the mushrooms to grow well from one to the next. A good mixture of the two (about 20% chips to 80% sawdust or fine wood chips works best. If you have a chipper that grinds them fairly small but not quite sawdust, like I have, it works well as is. Just don’t use wood shavings from your pal’s wood shop. Even if they use the right kind of wood, the curled shape keeps the shavings from packing very well and the mushrooms don’t grow well on it.

The next step is to pasteurize the wood chips. You want to get the wood chips up to about 180 degrees F and leave them there for an hour to kill pathogens. Then you need to get mushrooms growing on it. Other wood chip spawn works quite well. You can also use stem butts or even plug spawn. Then grow it like you would any mushroom block. When it is ready, you fruit the block a few times and then break it up onto your next substrate. That can even be more wood chips.

Just realize that every time you transfer mycelium, you run the risk of contamination.

*Notable exceptions are Coprinus comatus (shaggy manes) and Stropharia rugoso-annulata (king stropharia), which require a casing layer to produce mushrooms, Polyporus tuberaster (stone mushroom), which forms a sclerotium, and Morchella species (morels), which are just weird.

Friday, February 25, 2011

GeekDad!

Today I officially became a part of the GeekDad team over at Wired. This gives me the opportunity to flesh out the geek side of my garden geek nature. Check out my first post on using physics to snap off the woody end of an asparagus stem while keeping as much of the tender part as possible. I will still keep posting here so this blog isn't going anywhere.

Thursday, February 3, 2011

Spore Mass Slurry

Wood chips 2 weeks after addition of spore mass slurry

Nature seeks equilibrium. This is a concept that can be seen throughout natural systems, but nowhere more evidently than in reproductive rates. Ideally, a natural system, in its most natural state, is in perfect equilibrium. Each individual in the system seeks to replace itself, no more, no less. Sure, all organisms would like to increase their numbers and increase their success, but gone unchecked, this is the path to starvation and disease. Averaged across a population and over centuries, a population in balance with the rest of its environment will average one successful (in this case successful means “grows to adulthood and reproduces”) offspring per mature individual.

Looking at a species’ reproductive strategy can tell you a lot about their place in the ecosystem. Top predators, like wolves and big cats most directly reproduce one to one. Sure, many offspring are produced, but accidents and disease are taken into account and not much else. Rabbits are prey animals. They can produce dozens of offspring in a single year and hundreds in a lifetime. They pay a heavy price to predation, and this must be taken into account in the reproductive strategy. An oak tree can live for hundreds of years. Once it reaches maturity, it can produce thousands of acorns every year. Its reproductive strategy takes into account the squirrels (who plant the acorns) eating most of each year’s crop as well as mortality of oak seedlings.

Mushrooms have among the worst reproductive success out there. A mushroom with a decent source of food can live for 10 years, sometimes much, much more. Each year it can produce dozens of mushrooms. Each mushroom is capable of producing billions (yes, that big number is plural) of spores. Only two spores are needed to reproduce; they must land near each other on a food source, germinate, and then mate to produce a healthy mycelium. How is it that each individual must produce literally trillions of spores to simply replace itself in the ecosystem? Personally I think it speaks to the inefficiency of spores as a reproductive strategy. There is a reason plants moved away from spores and towards seeds as a reproductive device. Spores are just not very effective or very efficient at producing offspring.

Often when I speak to friends about growing mushrooms, their first question is “where do you get the spores?” I have to explain to them that nearly all mushroom cultivation is done by the direct transfer of mycelium from one medium to the next. This is  because it is so difficult to successfully and reliably achieve reproduction from spores. However, there are times when spores are available and a good medium for what you are trying to achieve. It is for those times that it is useful to have a method for utilizing the spores that gives them the greatest chance for success. That is when we use a spore mass slurry. A spore mass slurry was a method developed by mycologist Paul Stamets as a way to spread spores over a wide area in a way that helps give them a head start.

The first step is to acquire spores, and that is the hard part. Usually, the best way to acquire spores is from a spore print. If the spore print is taken on glass, the spores can be dried, scraped off, and stored. If the spore print is on paper, the paper can be dried, folded, and stored. You can also add the mushroom directly to the liquid once it has cooled, letting it soak, gills (or pores) down for 4 hours, letting it release its spores directly into the liquid. I have gotten lucky recently and have come across some Coprinus comatus (shaggy mane mushroom) spores. Normally, when shaggy mane mushrooms come up, they quickly deliquesce into an inky, gooey mess, and are gone. Here in Arizona, the exterior of the mushroom dries before the process can complete. The interior still deliquesces, though, only to dry on the inside of the cap. The hollow mushroom that results can be stored. When the spores are needed, it can be immersed. Once wet, the mushroom will deliquesce the rest of the way and the spores will disperse into the surrounding liquid with ease.

Water with molasses and salt added and mushrooms to be added
The actual recipe for a spore mass slurry is quite simple. Take one gallon of rainwater (filtered tap water or distilled water will also be fine, but beware of water straight from the tap as it has too much chlorine here in the US) and bring it to a boil. Add one tablespoon of molasses and one quarter teaspoon of salt. The salt helps inhibit the growth of bacteria that would normally happily consume the protein-rich spores. The molasses gives the spores a little sugar and other nutrients and entices them to begin germinating. Once the mixture is complete, boil for 10 minutes. Then take off heat and cool until it has reached room temperature.

Spore mass slurry after 48 hours
Once the liquid is cool enough, you can add your spores. Let the liquid sit in a cool corner of your house for 24-48 hours. Once it has sat long enough to begin germinating, pour the slurry directly on your substrate. Don't leave the slurry in its liquid form for much more than 48 hours, though, as oxygen and nutrients run out. Also consider that mycelium is a terrestrial organism, not an aquatic organism. It likes the liquid to get started, but it really needs wood or soil to grow properly.

Personally, I prefer the use of a spore mass slurry over a mushroom kit for more dispersed growing. For example, many mushrooms are great additions to the garden or compost bin. A spore mass slurry is a good way to spray germinating spores across a wide area and, provided you have access to spores. It can also be a lot less expensive and easier than inoculating with wood chip spawn. You just have to take failure rates into consideration.

Monday, January 31, 2011

Cardboard Mushroom Spawn

One of the great things about growing mushrooms is that growing materials are often free. Sometimes they even save you from throwing things away. Using cardboard as mushroom spawn is one such example. Cardboard is made of raw, unbleached paper, which is a good growing material for mushrooms and the corrugations are held together with a glue that is also very digestible by mushrooms. The channels in corrugated cardboard give the mycelium an easy channel to run down and travel quickly.

Personally, I find that mushrooms produced on cardboard tend to be kind of anemic. The open structure, while ideal for travelling mycelium, isn’t really dense enough to produce lots of mushrooms. However, the sheet form that cardboard comes in makes for easy transfer from one medium to another. If you are making a wood chip mushroom bed, you just lay down a layer of wood chips, then cover it with your cardboard spawn and then add another layer of wood chips, for a total of about 6” thick. You can use cardboard spawn for making mushroom logs as well. You take a chainsaw and cut a wedge in the log, line it with your cardboard spawn and hammer the wedge back in. When making a mushroom block out of wood chips or coffee grounds, you can just tear up the cardboard and mix it in. It will spread from the cardboard.

Making cardboard spawn is really easy. The first thing to do is find a good source of cardboard. Something that has already been through the mail is fine, as long as it isn’t covered in grease or other such toxic or unidentifiable chemicals. Cardboard spawn is best grown rolled up, so a container that will fit a roll of cardboard, like a glass jar or a bucket, works nicely. Then cut the cardboard to fit your container.

The next step is to clean the cardboard to remove potential contaminants. The nice thing about cardboard is that it is a pretty hostile environment, so you don’t need to worry about too many contaminants unless it has bee sitting outside for a long time. The biggest thing you need to worry about is mold spores. You will need to get rid of those. There are two basic ways to do that. The first is with boiling water. Put your cardboard in its container and fill it with boiling water and put on a lid if it has one. Let it sit about an hour. That will kill almost all mold and bacteria. The problem is, it also dissolves the glues, destroying the structure of the cardboard.  Fortunately, there is a second method involving hydrogen peroxide.

As many mushrooms grow, they naturally want to claim territory that they occupy as their own. One major source of possible competitors is spores of other fungi. Most mushrooms produce various peroxidase compounds as they grow. These compounds destroy the spores without harming the mycelium. Hydrogen peroxide is a very similar compound to what the mycelium produces and has much the same effect. So I will put some hydrogen peroxide in a spray bottle (or just transfer the spray nozzle to the peroxide bottle) and spray the cardboard down. I don’t dilute or anything. The hydrogen peroxide will break down into water pretty quickly and won’t harm the mycelium in small amounts.

Once the cardboard is treated, you can just layer your previous spawn on top. Wood chips from a spent mushroom block is a good medium of transfer. I also find stem butts particularly effective for transfer onto cardboard. Either way, you lay it on top and then roll it up as tightly as you can. Then put it somewhere and keep it moist. It is ready to transfer when the entire surface is covered with white, cottony mycelium and it no longer smells like wet cardboard.

Oh, and when you are finished transferring it to its new home, consider setting aside one sheet of cardboard. You can roll it in a fresh sheet of cardboard to make all new cardboard spawn.

Thursday, January 6, 2011

Coffee Ground Mushroom Spawn

There is a fine line between a medium that is used for mushroom spawn (that is, to transfer to another medium) and one that is used as a growing medium. Some, like cardboard, are more structurally suited to transfer and may not have enough nutrition to take the mycelium all the way to a bountiful flush of mushrooms. Others, like straw, which is messy and difficult to fully sterilize, are more suited to fruiting and less good for production of spawn. Coffee grounds is one that is good for both. The granular nature of the grounds makes for quick and easily colonization by the mycelium. The process of making coffee out of the grounds conveniently sterilizes the growth media, limiting the opportunities for contaminants. The woody nature of the seed pod of the coffee bean also provides good woody material as well as abundant nutrition for the mycelium. Another nice feature is that most coffee filters are made of paper, which is also readily digestible by mycelium.

The first trick is to find a suitable mushroom to grow on coffee grounds. I have had great luck with both Pleurotus ostreatus (pearl oyster mushrooms) and Hypsizygus ulmarius (elm oyster mushrooms). I am currently attempting it with Agrocybe aegerita (pioppino/black poplar mushrooms), but my stem butt was small and it hasn’t made much progress yet. I suspect that there are other mushrooms that would do well in this medium as well, but not being a coffee drinker, I don’t have too much opportunity to try out new combinations. Also, I prefer to start my coffee ground cultures with stem butts from fresh mushrooms. If you are a one-pot-a-day household, this method works really well.

The method for growing mushrooms on coffee grounds is really easy. Wait until your coffee grounds are cool enough that they are no longer steaming, but not quite cold and put one pot worth of grounds, including the filter, in a bag or jar. Nestle the stem butt (or a little sawdust spawn, or whatever spawn you are using) into the center of the coffee grounds. In about two days, the spawn will recover from the transfer and will have visible signs of growth, in the form of a white, fuzzy coating. From there, you can add more coffee grounds at the rate of about one pot a day. Again, the coffee grounds should still be warm, but not warm enough to burn your hand. You add coffee grounds as the mushroom grows. If you start to get too far ahead of the mushrooms, as evidenced by a lot of uncolonized grounds in your container, stop adding for a few days until the mycelium catches up. The mycelium should more or less colonize the grounds after they have been in there just a day or two. If it takes much more than that, contamination can become a problem.

Moisture is another issue. Often coffee grounds have residual liquid in them. Mycelium can’t really colonize substrate that is under water. If I am using a gallon Ziploc bag, I will just pour the liquid out as it accumulates. In a glass jar, however, the liquid can be used for another purpose. Glass jars have less air flow than a bag that can be fully opened. When the jar is full, you can get fresh air down to the mushrooms if there is a little liquid in the bottom by just turning it upside down. As the liquid travels through, the pores in the material will be filled with air, which naturally has to be drawn from other areas. Just open the jar to get a little fresh air in the top, then turn it over and let it sit a few hours. Then turn it over again. Just don't do this before the jar is full as it will disturb the mushroom too much.

Overall, the container should be opened once a day to give the growing mushrooms a source of air. Usually this is accomplished when you open it to add the coffee grounds for the day. You can also give the mushrooms air flow by using a canning jar and replacing the sealing portion of the lid with a coffee filter (unused) or a piece of fabric.

Just keep the jar in a cool, dry location while it is growing. Once the jar is full and the mycelium has fully colonized it, as evidenced by the fact that it is all cottony-white and no longer smells like coffee, it can be used as spawn to transfer to another medium or it can be just fruited. To fruit it, give it another week or so to grow, and then open up the jar. Put it out in the light, but don’t put it in direct sun. Put a plastic bag over it as a tent, but punch a few holes in it for air flow. Then spray it a couple of times a day. Personally, I know a lot of people like to try to force the process, but I like to let the mushroom tell me when it is time. When, in the process of your daily airings, you see primordia, tiny baby mushrooms that look like pinheads, you will know it is time to fruit the mushrooms. You should get two or maybe three good fruitings out of a jar and maybe more out of a bucket.

Once the medium is done fruiting, you can still use it as spawn to start another kit. You can mix it with more coffee grounds, or just compost it again and start with another stem butt.